


Imagine stepping out onto your new deck, the sun shining overhead, the air filled with laughter, and mouth-watering scents wafting from the grill as your family gathers. Nice, isn't it? But when you look down, the scene isn't so inviting: There's a damp, muddy, underutilized space lurking beneath your beautiful deck.
Don't let this valuable space go to waste when planning your dream deck! Transform the area below into a functional outdoor space with Trex RainEscape, the ultimate under-deck drainage system.

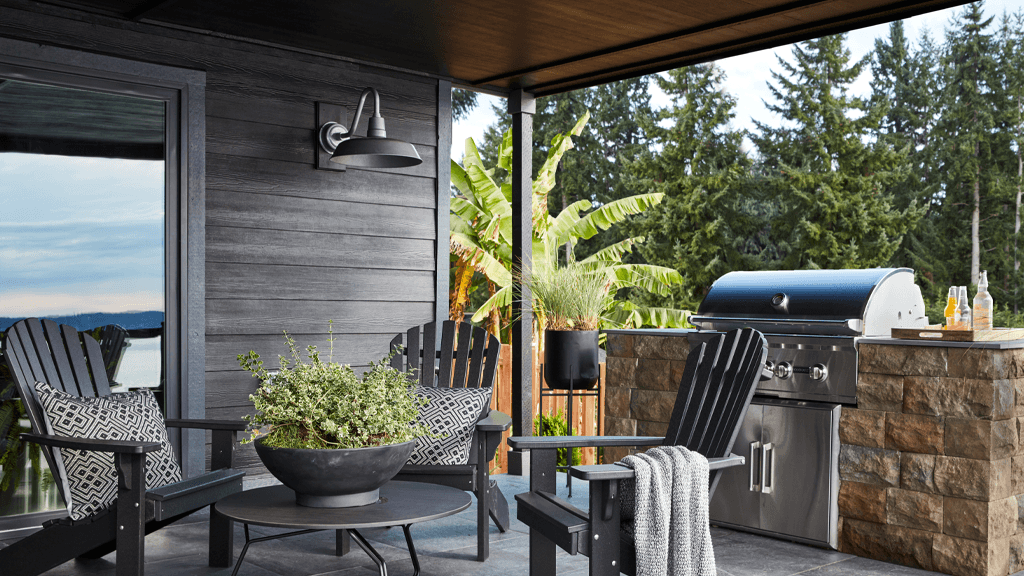
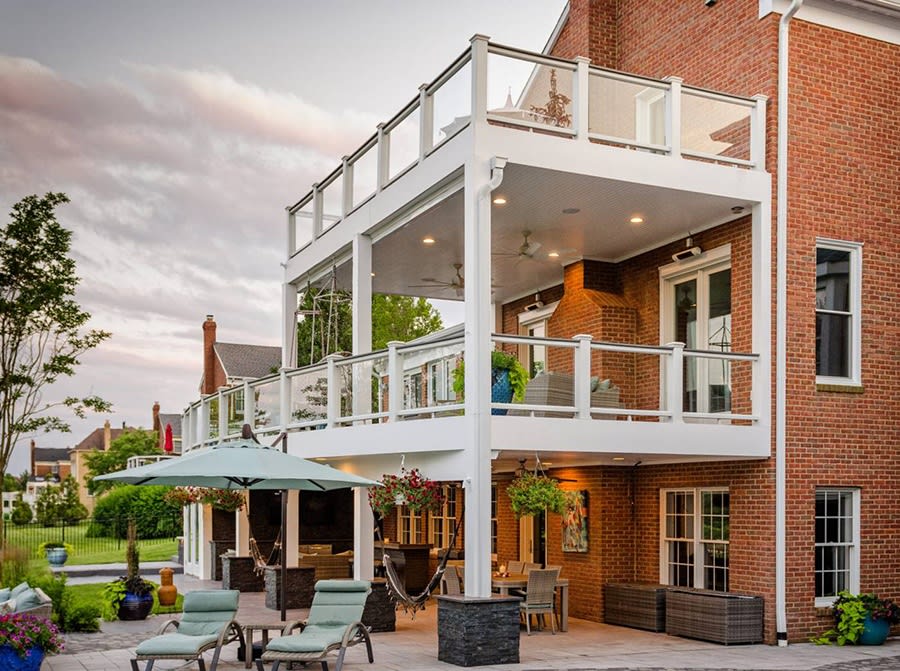
Under-deck living space protected by Trex RainEscape
Whether you'd like to use your bonus space for a cozy seating nook, a convenient storage area, or even an outdoor kitchen or rec room, Trex RainEscape makes it possible by keeping the space underneath clean and dry. And did we mention it's an investment that can also prolong your deck's life, save you money, and increase your property value?
Get ready to unlock the full potential of your new elevated deck with RainEscape!
The Trex RainEscape Difference
Trex RainEscape is not your average under-deck solution. Unlike other products that leave your deck joists vulnerable to water damage, Trex RainEscape's innovative above-the-joist system features a trough and downspout construction that drains water away, protecting the space below from the elements—and your deck's structural integrity over time.
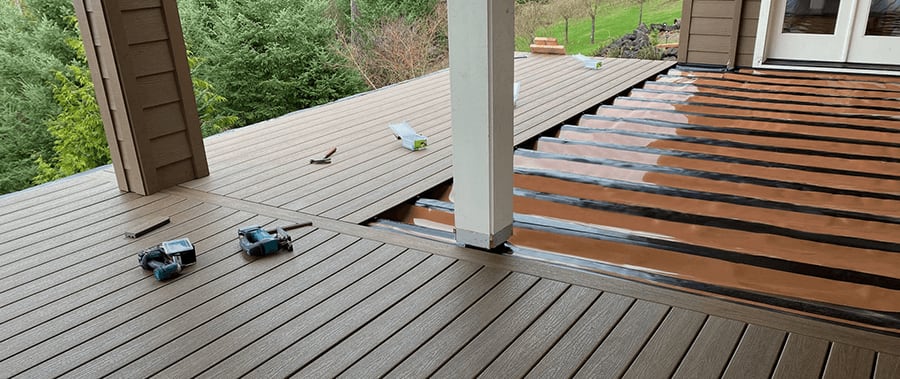
Water infiltration can lead to rotting, warping, and structural issues, necessitating expensive repairs or even deck replacement in the future. Trex RainEscape covers and protects all of the wooden substructure, extending your deck's life by proactively safeguarding it against moisture-triggered problems and unwanted costs down the line.
Of course, the main attraction of this effective system is the creation of a dry space beneath your deck that you can design in any way you like, including adding utilities for a ceiling fan, Trex RainEscape Plug and Play Soffit Lights, TV, or a gas fireplace, for example. By expanding your home's footprint with additional living or storage space, you not only enhance your own overall use and enjoyment, you also boost your property value as you double your usable outdoor space.
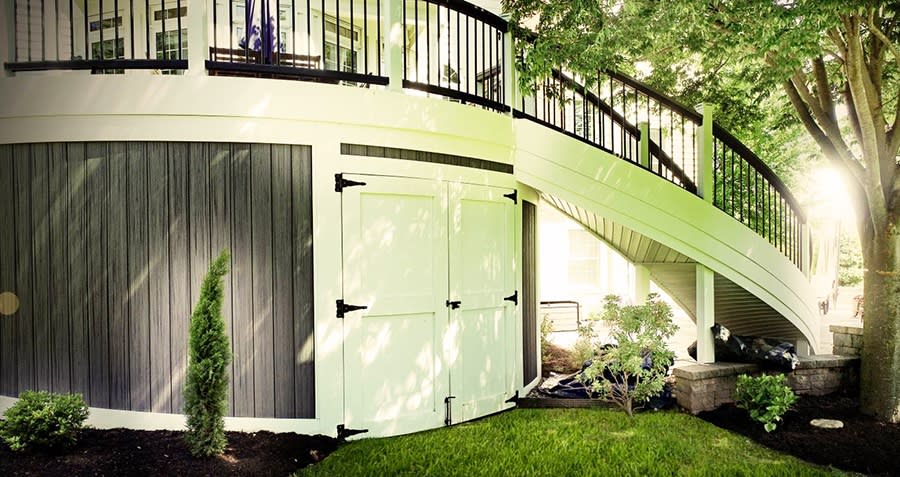
Under-deck storage protected by Trex RainEscape
For added peace of mind, Trex stands strongly behind the quality and durability of RainEscape and has recently extended the warranty from 20 to 25 years:
"We firmly believe in the outstanding performance and advantages our products deliver to both contractors and homeowners. These warranty extensions provide our customers with an extra layer of assurance that their investment in their outdoor space will remain protected for decades to come." - Dave Kile, Trex RainEscape
From this enhanced warranty to the long-term protection provided by the system, Trex RainEscape has you covered!
RainEscape Installation Steps
We're sure you'll want to include RainEscape as part of your deck project, so here's a quick rundown of what you—or your deck professional—will need to install your Trex RainEscape system.
RainEscape components
TIP: Trex RainEscape Downspouts and Troughs are available in Brown and Black; see Choose the Best Trex RainEscape Color for Your Deck to help make your selection.
Recommended:
Tools
- Scissor or utility knife
- Staple gun
- Caulk gun (for use with flashing)
The following steps provide a general overview of the installation process. To ensure a quality installation and for details on flashing, carefully read and follow all instructions provided with your RainEscape product.
Prepare by placing a temporary midspan nailer on the underside of the joists to keep them straight and prevent rolling, then:
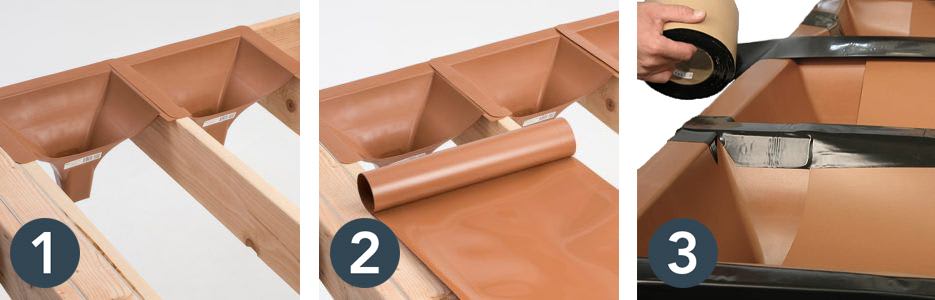
Step 1: Install the Trex RainEscape Downspouts
The first step is to install the downspouts. Cut the downspouts along the marked guidelines based on your joist spacing of 12" or 16". Install them along the rim joist or ledger board, ensuring they extend 1" into the gutter. Staple the downspouts in place to secure them.
Step 2: Install the Trex RainEscape Trough
Next, it's time to install the troughs. Before installation, acclimate the trough material by folding a soft crease down the center or letting it sit unrolled for a while to adjust to the temperature. Align the trough with the joists with the smooth, shiny side facing up. Trim the trough making sure it's about midway across the funnel, then push the trough down into the opening of the funnel. Staple the trough to the ledger board and joists in a zigzag pattern, working your way across the deck.
TIP: If possible, have a second person hold taut the loose corner of the trough as you unroll and staple.
Step 3: Seal the Seams
Finally, to ensure a watertight seal, use Trex RainEscape butyl tape to cover the trough seams and all screw sites. Apply the tape on top of the joists, covering the overlapping trough layers and sealing around screws. Cut a small 1" x 3/4" tab where the trough meets the downspout and fold the tab straight down to prevent water from wicking up underneath the trough and leaking outside the downspout funnel.
For a look at the process, check out this Trex RainEscape installation video:
Tips for Trex RainEscape Installation
- Make sure all joists are straight and square.
- Add outlets to the gutter every 12-14 feet.
- Cover all joists and blocking with trough material, then seal with butyl tape.
- Ensure the troughs and downspouts are dry and clear of debris before applying the tape.
- Avoid stapling Trex RainEscape products anywhere other than into or over floor joists, ledger, rim joists, or headers.
- Do not use nails to attach deck boards above the Trex RainEscape system.
- Use Trex RainEscape Wall Flash to seal the space between your house and ledger board for added protection.
BONUS PRO TIP: Add an access panel. The panel allows you to check the gutter without removing the soffit. While rainwater or a hose will typically clear the gutters, in the case of a heavy leaf fall or an unusual amount of debris accumulation, an access panel will simplify cleaning.
Enjoy Your Deck to the Fullest
By choosing Trex RainEscape, you're not only ensuring a dry and functional space but also creating an opportunity to enhance your deck with under-deck ceilings, utilities, additional features like lighting, or even a fully-equipped outdoor kitchen. The possibilities are endless, whether you want to create an oasis for entertaining or relaxation, or utilize the space for much-needed storage.
To include a below-deck area that also protects your new deck's structure long-term, enter your deck information into our Trex RainEscape Cost Estimator and start planning your project!
Contact us with any questions you may have while planning your new deck, and be sure to check out our extensive selection of deck railings—including cable, composite, glass, metal, and vinyl options—to find your perfect style.
Check your local building codes before starting your deck project and follow all rules, regulations, and requirements.