


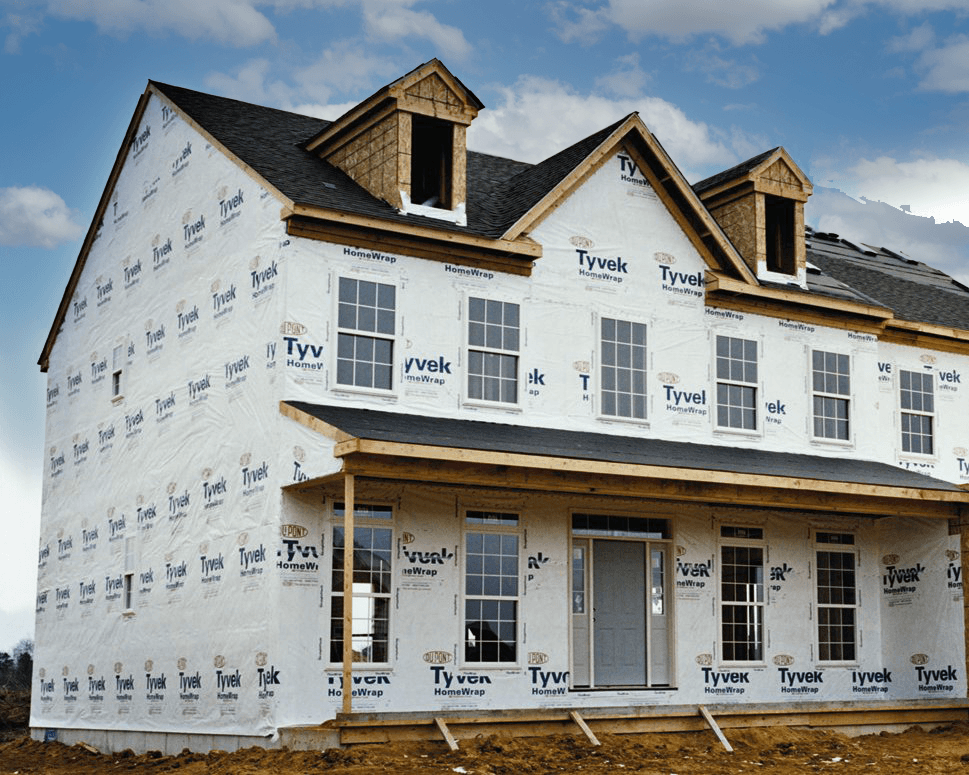
If you want to learn more about DuPont Tyvek HomeWrap—the original house wrap—you’ve come to the right place. Here you'll find valuable information and practical tips to help you understand Tyvek benefits and make the most of this popular house wrap on your next project. We've got you covered... in more ways than one!
The most important thing to know:
Tyvek HomeWrap's unique structure helps keep air and water out, while letting water vapor escape, resulting in a protected, more energy-efficient home.
Now let's get into the details.
The Tyvek HomeWrap Advantage
The key feature that sets Tyvek HomeWrap apart from other house wraps is its breathability. The non-woven structure of Tyvek allows moisture vapor to pass through, promoting drying within the wall system and helping prevent mold and water damage.
Simultaneously, Tyvek effectively stops air movement through the walls, improving insulation performance and energy efficiency.
Tyvek is also recognized for its exceptional water resistance. Its microscopic pores are so small that air and bulk water have difficulty passing through, resulting in optimal protection against moisture intrusion. Perforated wraps, on the other hand, can only increase their vapor permeability at the expense of water resistance, resulting in less effective performance.
In fact, the differences between Tyvek HomeWrap and perforated wraps are so im-pore-tant (sorry, couldn't resist), they really deserve a closer look.
Tyvek vs. Perforated Wraps
The primary distinction between DuPont Tyvek and other house wraps is in the material and construction. While many other house wraps feature perforations or holes for breathability, DuPont Tyvek HomeWrap is a non-perforated, non-woven product with microscopic pores.
Perforated wraps, typically made of a coarse, woven polypropylene slit film, struggle to resist air and water infiltration. To address this, a thin polypropylene film coating is added to seal the breaches and lock the weave in place. This, however, creates a non-breathable vapor barrier. To introduce breathability, thousands of tiny holes are punched through the film. While these holes allow some moisture vapor to pass through, they also compromise the wrap's ability to resist air and water penetration. This trade-off between breathability and air/water resistance is an ongoing issue for perforated house wraps.
By contrast, Tyvek HomeWrap is made of a continuous, nonwoven, non-perforated sheet. The sheet is formed by spinning extremely fine, continuous, high-density polyethylene (HDPE) fibers that remain unfused. This creates a strong, uniform web. Instead of holes, Tyvek features millions of tiny pores that effectively block bulk water and air penetration while allowing moisture vapor to escape.
The performance difference between Tyvek and perforated wraps is remarkable. In testing, Tyvek HomeWrap:
- Demonstrates 17x the water holdout capability of a leading perforated wrap, a significant indicator of the effectiveness of the building envelope.
- Exhibits nearly 4x the vapor permeability of perforated house wrap. This superior vapor permeability decreases wall cavity drying times, reducing the potential for mold and wood damage.
- Outperforms perforated wraps in air resistance, helping insulation perform closer to its full R-value potential by preventing air infiltration in the wall cavity. This advantage reduces long-term home energy costs for heating and cooling.
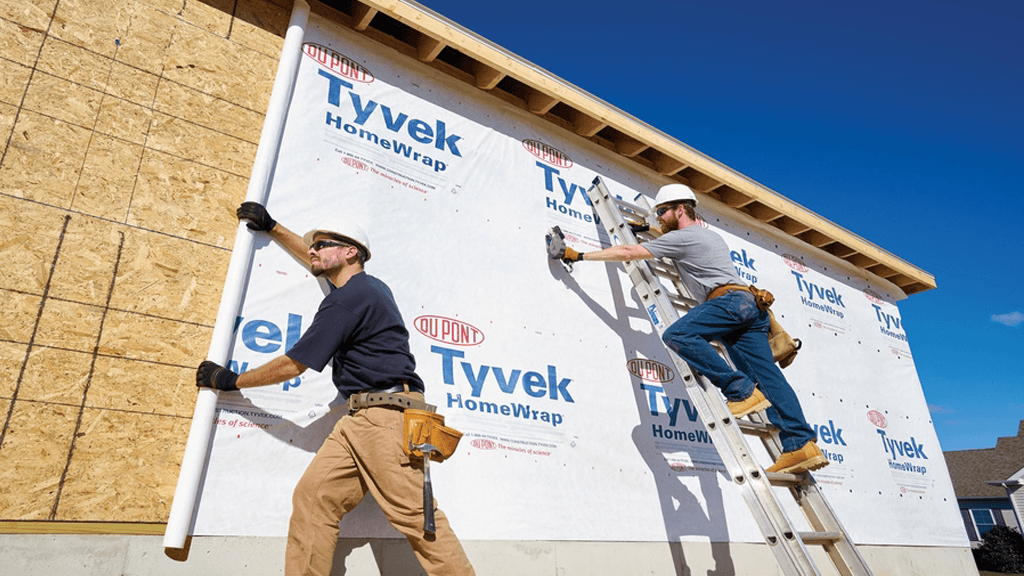
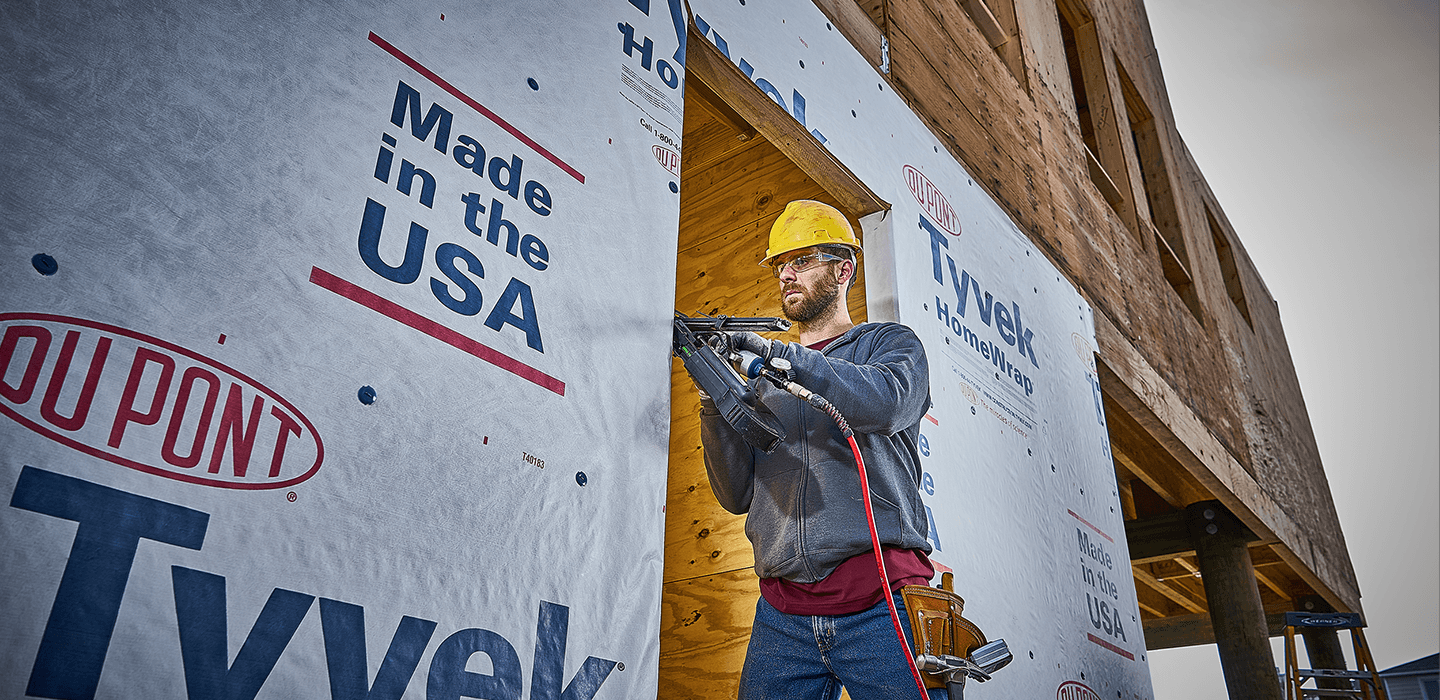
Installing Tyvek House Wrap
You know what makes Tyvek HomeWrap the right choice for your home, so let's take a look at the installation process. The overview below will help prepare you to install Tyvek house wrap with confidence for optimal product performance.
Be sure to read the installation instructions that accompany your Tyvek HomeWrap thoroughly for additional details and special considerations before starting your project.
First, you need to know when to install Tyvek HomeWrap during the construction process. The best time to apply the house wrap is:
- After the roof sheathing is installed
- After the step flashing and kick out flashing are installed.
- Before the windows and doors are installed.
Second, you need to know how to shingle your wrap: Always start at the bottom corner of the structure, overlapping the lower courses. Proper shingling is required to shed water and prevent it from entering your wall system.
Now we're ready to start the installation.
- Align roll at the bottom corner with the roll plumb. The bottom edge of the roll must:
- Extend over the sill plate interface by at least 1" (2" or more is reocommended),
- Extend to the bottom of the sill plate for slab on grade foundations,
OR - Be properly integrated with water drainage components, such as kickout or diverter flashing that directs rainwater away from the cladding and into the gutter, or a weep screed for stucco exteriors.
- Unroll the roll starting at the corner. Overlap all vertical seams by 6-12".
- Secure the wrap to the stud. Place your fasteners 6-18" apart on vertical stud lines. Do not install fasteners within 6" of sills and jambs or within 9" of the head of window rough openings.
TIP: Markers are printed 8" apart on Tyvek HomeWrap to help you align with your studs.
Use nails or staples recommended for house wrap, including STINGER Fasteners and DuPont Tyvek Cap Fasteners.
TIP: Installing with STINGER collated tools is 50% faster than applying fasteners by hand.
- Unroll directly over windows and doors, with the upper layer of wrap overlapping the bottom layer by at least 6".
If windows are already installed, integrate your wrap by properly shingling it with the window flashing. If using FlexWrap NF and an apron, install Tyvek HomeWrap under the apron. If using a non-self-adhering sill flashing, install the wrap under the bottom of the sill flashing.
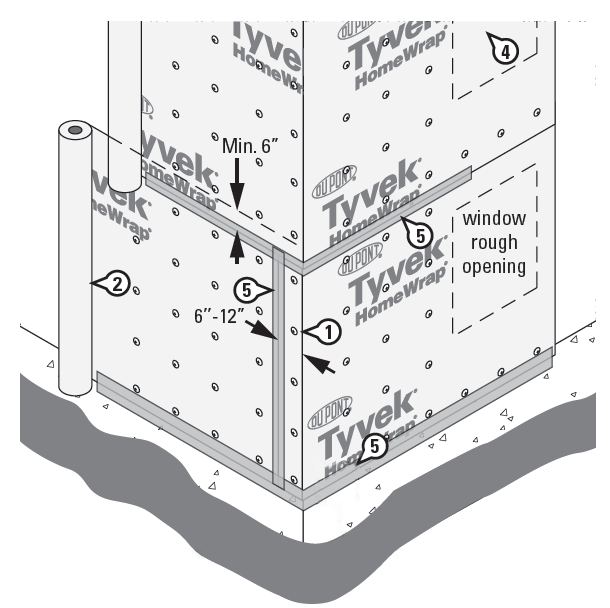
- Tape all vertical seams with Tyvek Tape for superior Tyvek-to-Tyvek adhesion, ensuring a strong and continuous barrier against air and bulk water penetration as well as added protection during the construction phase.
For air barrier installations:
- Tape horizontal seams. This is also a recommended best practice even when the wrap is not installed as an air barrier.
- Tape or seal all terminations, such as roof-wall and bottom-of-the-wall interfaces.
- Prepare and flash windows and doors. Consult your flashing manufacturer's installation instructions for windows and doors after wrap installation.
For additonal details, check out DuPont Tyvek Water-Resistive and Air Barriers Installation Guidelines.
Finally, plan to cover your Tyvek HomeWrap within four months (120 days) to prevent prolonged UV exposure.
Wrapping It Up
House wrap is meant to last as long as your structure does. That makes your home wrap decision an extremely important one: You (or someone else) will be living with the consequences for many years to come. When planning your construction, choose Tyvek HomeWrap with confidence for the durability, energy efficiency, and moisture management you want long-term.
If you have any Tyvek house wrap questions, contact us—we're here to help you wrap things up right!