


You’re staring down at not eight, not nine, but ten fastener holes and you’re wondering:
Is there an alternative to the hurricane tie that I can use and still meet code?
Code compliance for rafter or truss to top plate connections can be simple: three to five nails are often all that’s required.
But counties in severe weather hotspots—and the contractors who need to comply to their local codes—require a more solid connection to provide an extra level of protection against intense winds. This is traditionally tackled with hurricane ties and a tedious, ten-nail installation process.
A whole lotta nails
A standard H2.5A hurricane tie has no less than ten holes, and each one is waiting for a nail. And each rafter is waiting for a hurricane tie. A little quick mental math tells you that you’re going to be busy for a while…
If you’re manually hammering along at a decent clip, it could easily take you close to a minute per tie. And that’s not including the additional time spent when you drop your nails or catch your thumb and need to pause to let the expletives fly. We kid. But it’s definitely time-consuming.
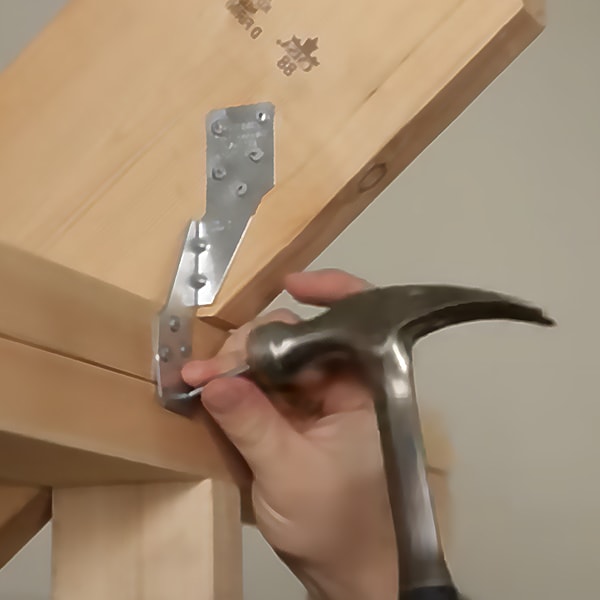 H2.5A hurricane clip installation with ten 8D nails
If you go the nail gun route, you can speed up your tie installation, but you still have just as many holes to fill. If you’re putting a tie on every rafter, that’s a lot of nailing. If you’re doubling up with ties on both sides, multiply your work by two.
Fortunately, we have alternatives.
Screw that
Can you really keep the lid on while also avoiding the endless nailing required by hurricane ties? Yes!
In most cases, a six-inch FastenMaster TimberLOK or FrameFAST, Starborn Structural H19, or CAMO Truss Screw can make that rafter or truss to top plate connection faster, stronger, and more economically—and make it code compliant.
Generally, you can use these screw alternatives where you’d otherwise use a standard H2.5A hurricane tie. In the most extreme wind zones where ties beyond the H2.5A are required, they wouldn’t be an option, so bust out that hammer. As always, consult your local building codes.
For the rest of you: One screw or ten nails?
That’s an easy choice.
From the perspectives of time, labor and materials, code-compliant truss screws are a clear winner. If you install a single truss screw in, say, about five seconds, you could secure 12x more connections in the same time it’d take to install just one of those hurricane ties with a hammer. And at one screw to every ten nails, you’ll also complete 10x more connections per fastener.
That’s savings from every angle. Speaking of angles…
Get the right angle
For a rafter or truss over a double top plate, whether aligned between the studs or directly over them, install your six-inch structural screw at an upward angle of 20°- 30°. A 22.5° angle—or half a 45° angle—is optimal.
Free-handed
For seasoned pros and those of you confident in your angle estimations, you’ll probably choose to install your screws by eye. We like that flex.
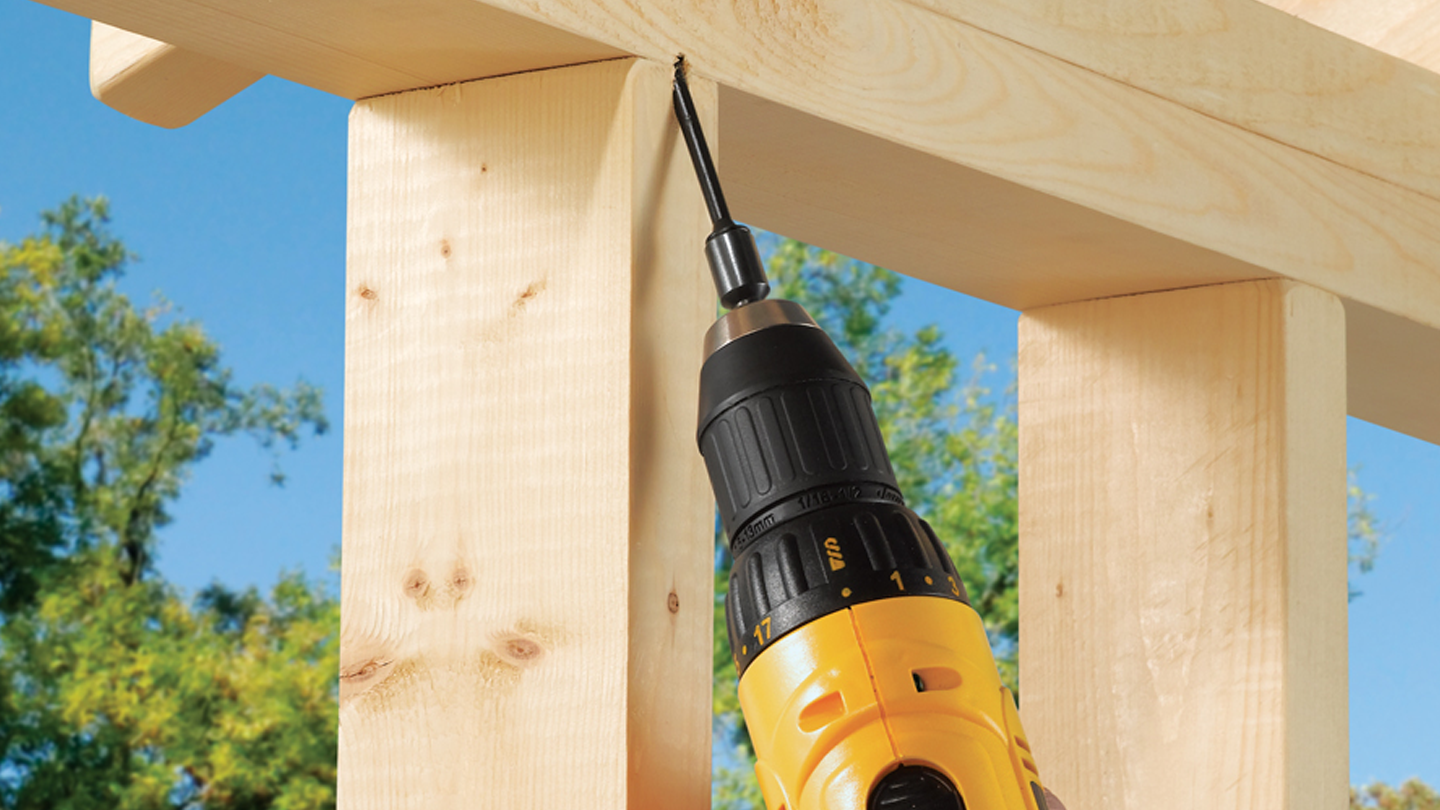
When installing a rafter or truss directly over a stud, place your screw in the seam, begin by drilling in straight, then drop down to a 22.5° angle.
 FastenMaster TimberLOK installation over a stud
When installing between the studs, place your screw directly into the underside, about one half inch in from the outer face and directly under the rafter or truss. Start drilling straight up, then draw your angle to 22.5°.
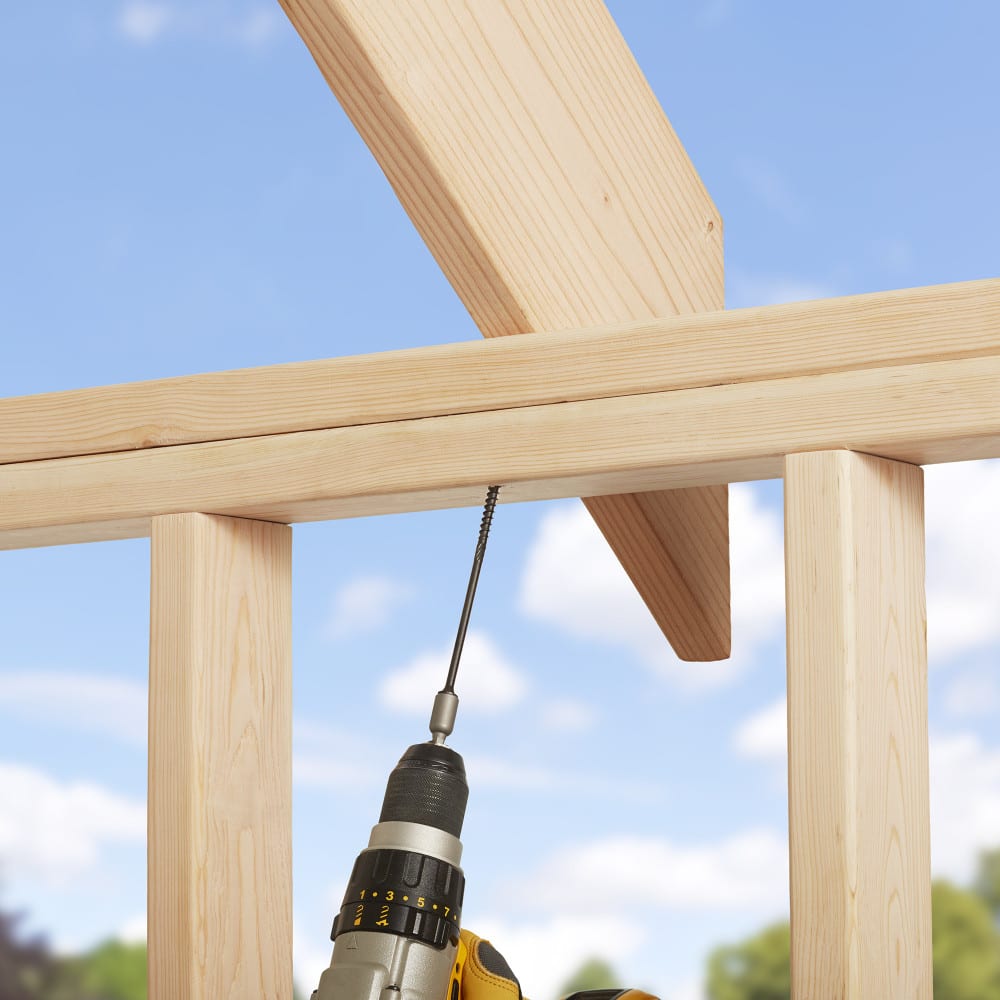 Starborn H19 installation between studs
Guided
If eyeballing the angle isn’t for you, a screw guide can help you get the perfect placement. Every pail of CAMO Truss Screws includes a hands-free truss screw guide to ensure the right angle every time—not to be confused with a 45° angle, which would be the wrong angle. We mean the correct angle, which is 22.5°. Couldn’t resist, sorry.
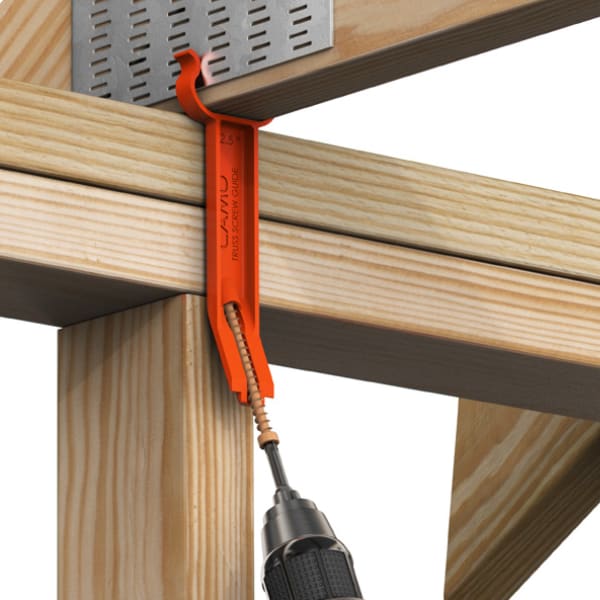
CAMO Truss Screw installation with guide
Delivery system
If you’re doing a lot of structural framing on a regular basis, consider a delivery system that drives jobsite productivity. The FastenMaster FrameFAST Truss to Top Plate Tool is specifically designed for the connection between the truss and the top plate of the wall. Getting a consistent 22.5° installation on your 6" FrameFAST structural wood screws is automatic and up to 8x faster than traditional methods.
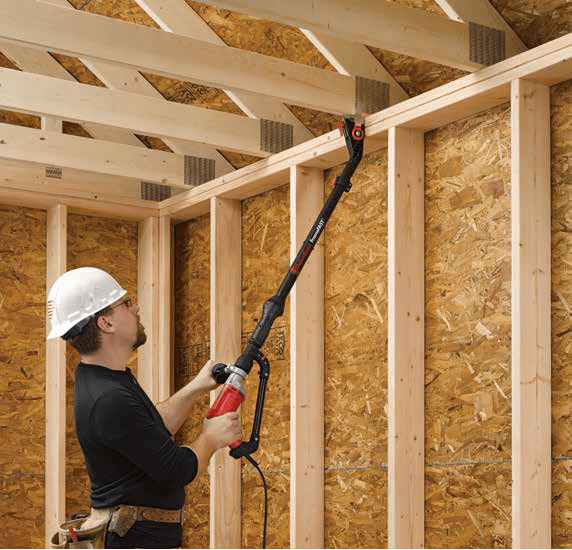
FrameFAST Truss to Top Plate Tool with FrameFAST Screws
Just center the truss between the tool’s adjustable alignment wings and press the head flush against the side of the plate. Push firmly upward until cleats embed into the truss, then drive the screw until it automatically disengages. That’s it, and you’re on to the next connection.
BONUS: The FrameFAST Tool keeps you and your crew off the ladder or scaffolding so you can make your code compliant connections with your feet planted safely on the floor.
Choose your screw
To help you choose the six-inch structural screw that’s going to save you from all that nailing of hurricane ties, below is a quick comparison of the screws that we’ve referenced in this post. For additional information, tech bulletins, and reports, click over to our CAMO Truss Screw, FastenMaster TimberLOK, FastenMaster FrameFAST, and Starborn H19 product pages.
All four screw options are IBC/IRC code complaint, corrosion resistant, and none require pre-drilling:
| CAMO Truss Screws | FastenMaster TimberLOK | FastenMaster FrameFAST | Starborn H19 | |
|---|---|---|---|---|
| Screw head | .335" cylinder | .3125" hex | .260" cylinder | .3125" hex |
| Threading | 6" | 2" | 5" | 2.5" |
| Point | Type 17 slash point | Gimlet | Gimlet | Tri-ForgeTM |
| Color | Tan | Black | Red | Black |
| Accessories included | T-30 star bit, truss screw guide | Hex bit | Torx Pro bit | Hex bit |
| Quantities | 50, 500 | 12, 50, 250, 500 | 200 | 20, 50, 250, 500 |
Questions? Our DIY Home Center experts know the drill! And they’re always happy to help.
Related reads:
- Structural Screws 101 Webinar (recording)
- CAMO Structural Screws for Pros in the Know
- HeadLOK vs TimberLOK Screws
Be sure to check your local building codes before starting your project and follow all rules, regulations, and requirements.