


Hog Tracks. Nope, we're not talking about maneuvering through the brush or wading through the wetlands in search of elusive porkers.
We're talking about the track system that's your ticket to fast, professional results when installing Wild Hog Panels. And we're here to share a few tips to make working with these tracks—and completing your next Wild Hog project—even easier.
First, a quick word about the Wild Hog Panels that these Hog Tracks hold neatly in place...
Wild Hog Panels
Inspired by the hefty, welded panels used to contain pigs on hog farms, Wild Hog's smaller version is perfect for rustic, modern, or industrial railing designs. Whether you're using them outdoors or in, these durable steel mesh panels provide visibility, durability, and versatility. And they look great. What more could you want?
If you said, "Easy installation," you've got it! That's where the Hog Tracks come in.

Wild Hog 6 Gauge and Smoky Mountain Panels
TIP: Be sure to check out Beyond Deck Railings: More Wild Hog Panel Ideas for lots of ideas on using these panels that'll get your creative juices flowing.

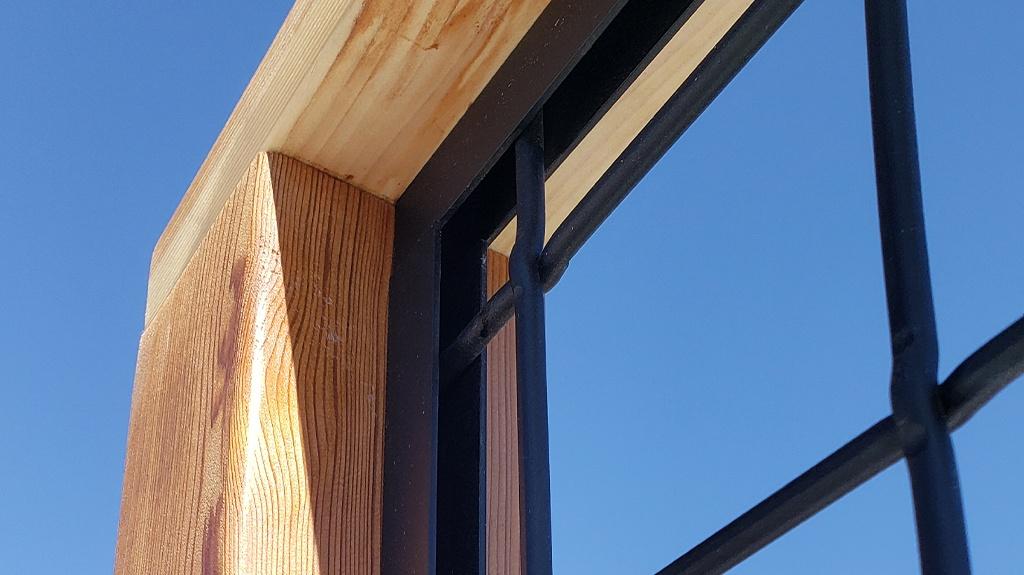
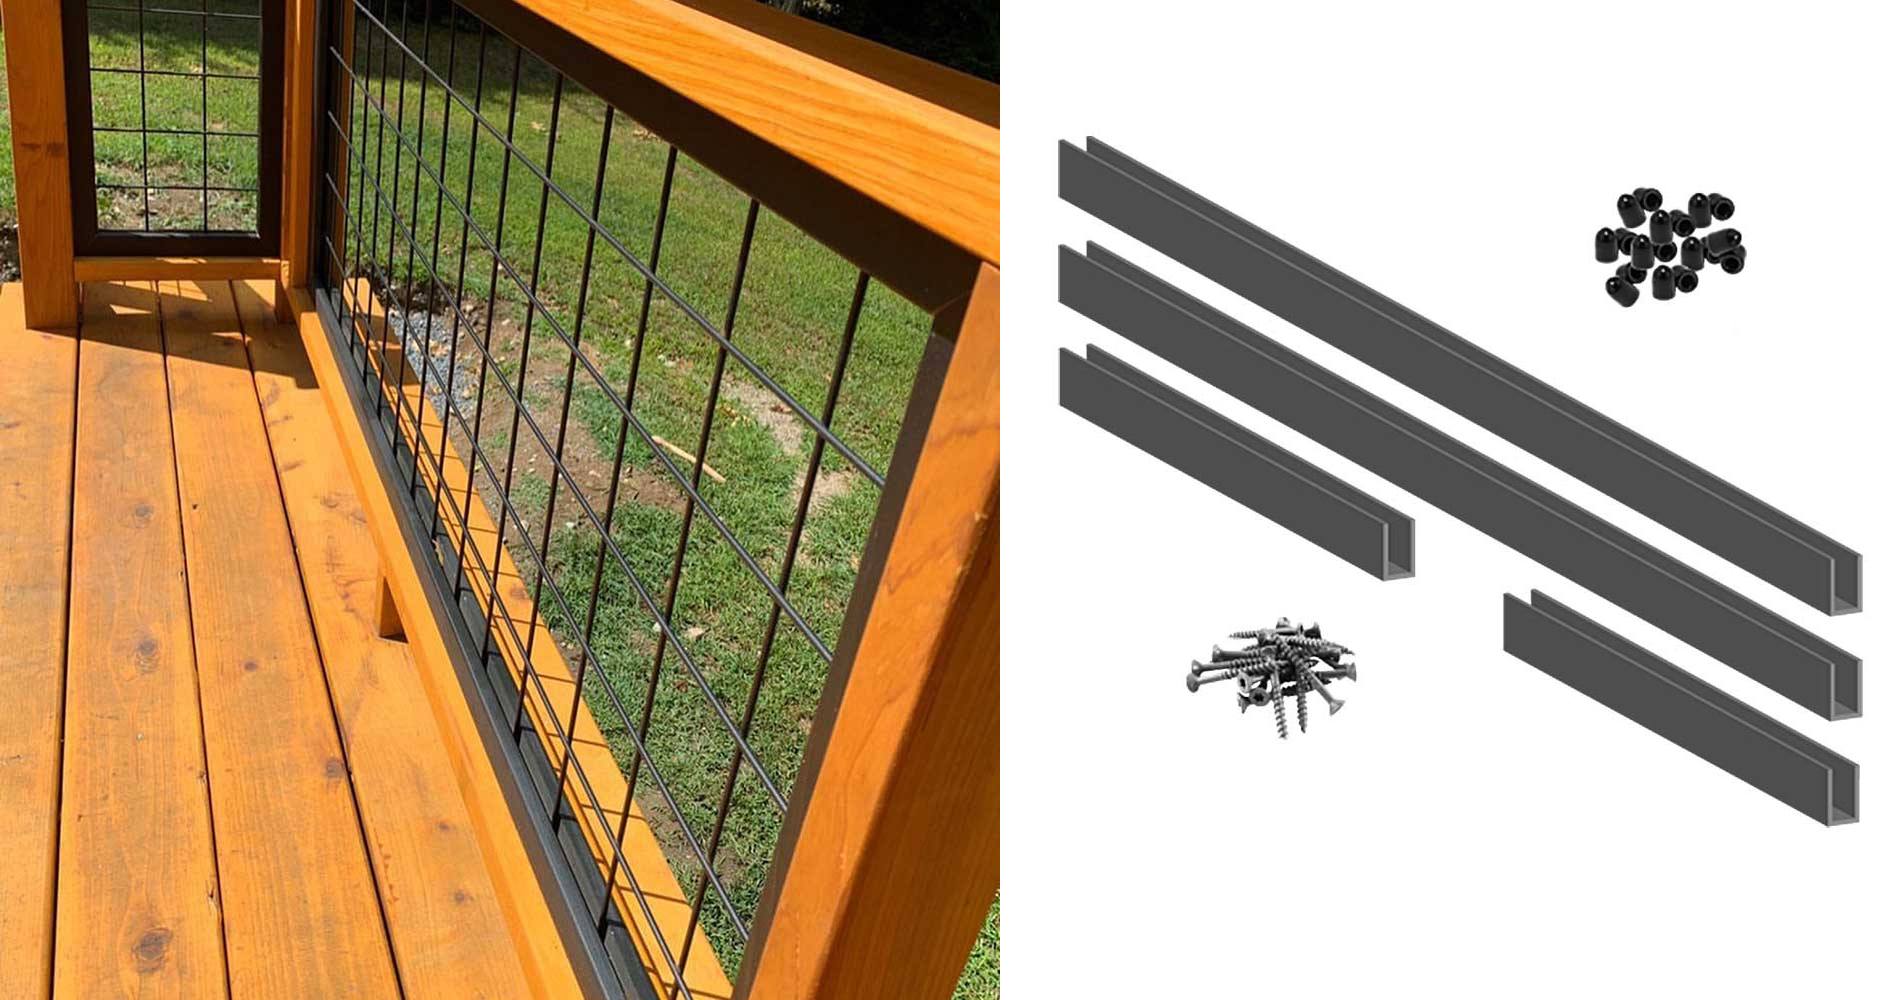
Hog Tracks
Hog Tracks fasten to your wooden rails and posts and your Wild Hog Panel fits in between for a firm hold and the clean look everyone wants.
Just attach the bottom track, followed by the side tracks, and slide your panel in. Then cap off your railing section with the final Hog Track attached to your top rail to hold it all in place. Simple!
BONUS TIP: If you want the unique look of Wild Hog panels with all the benefits of composite railing, be sure to check out the Freedom Fill accessory kit.
As easy as this system is, we do have some tips that can make your experience with Hog Tracks even better. Read on!

Planning
Hog Tracks come in individual lengths of 6 feet and 8 feet, in kits which include everything needed to install one Wild Hog Panel or as individual channels. Plan ahead for the most efficient combination of lengths when ordering tracks for your project to keep cuts to a minimum.
Not that they're difficult to cut...
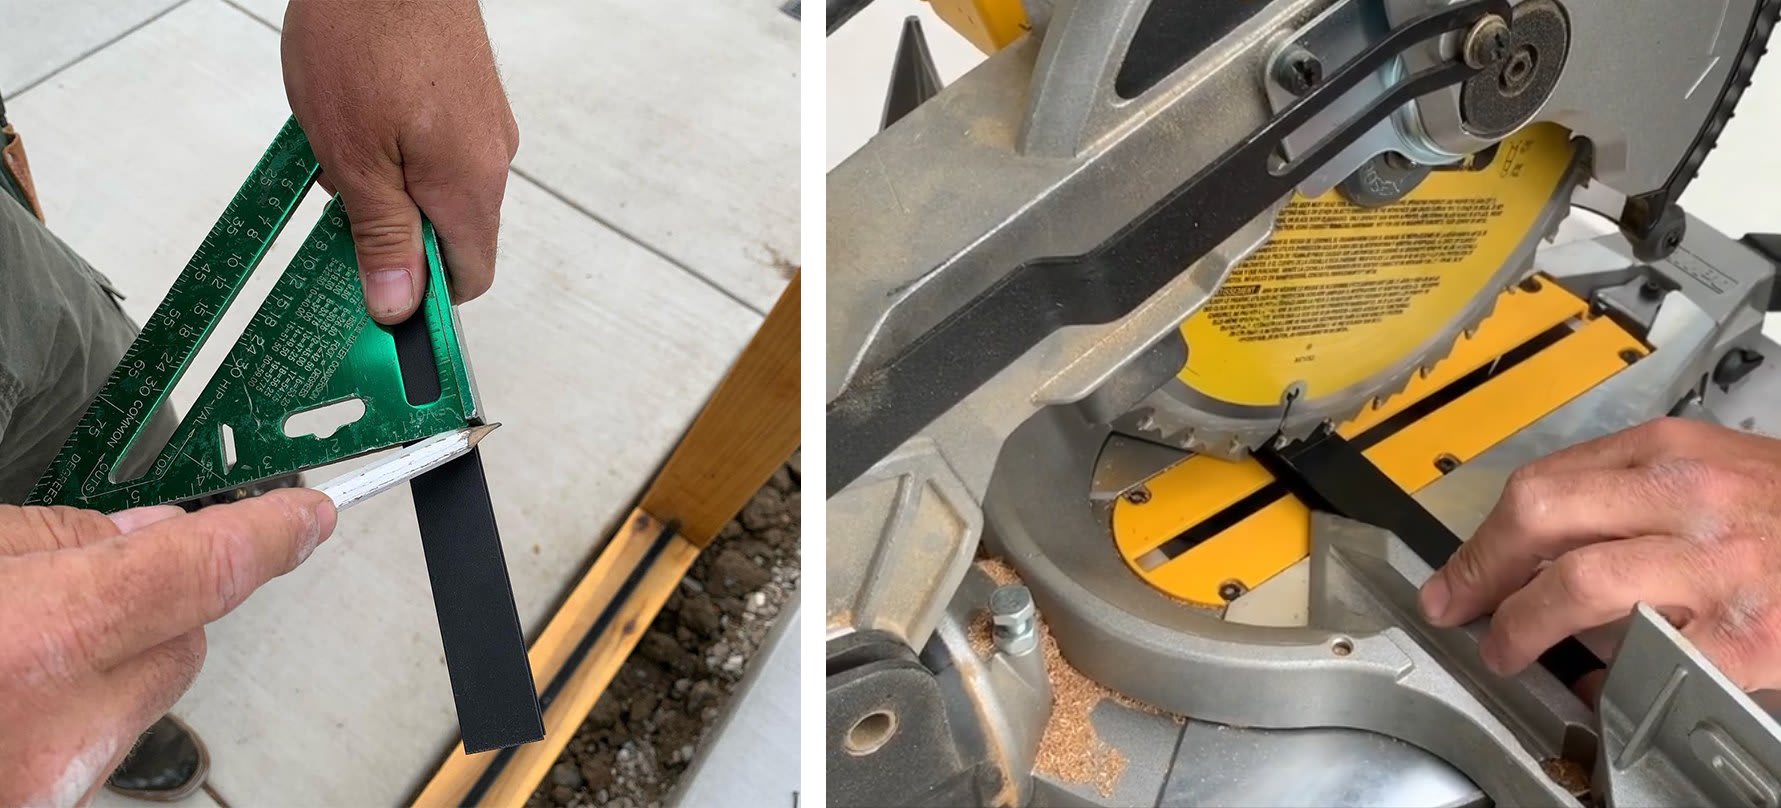
Cutting
When you're ready to trim a track, here are our top tips:
- For the cleanest cut, measure your Hog Track, mark your cut with a pencil, and use your miter or chop saw with a carbide-tipped blade.
Be sure practice safety, including wearing protective eyewear.
- Before you cut your side tracks, measure from the top of the track that's already mounted to the bottom rail and add 1 inch to accommodate the top track.
- After making your cuts, paint the cut ends with metal spray paint to seal the ends of the tracks prior to installation and reduce the chance of rust.
Drainage
Is water collection a concern for that bottom Hog Track channel? Wild Hog tells us that they've found the water typically dissipates at the ends where it meets the post and doesn’t collect in the channel.
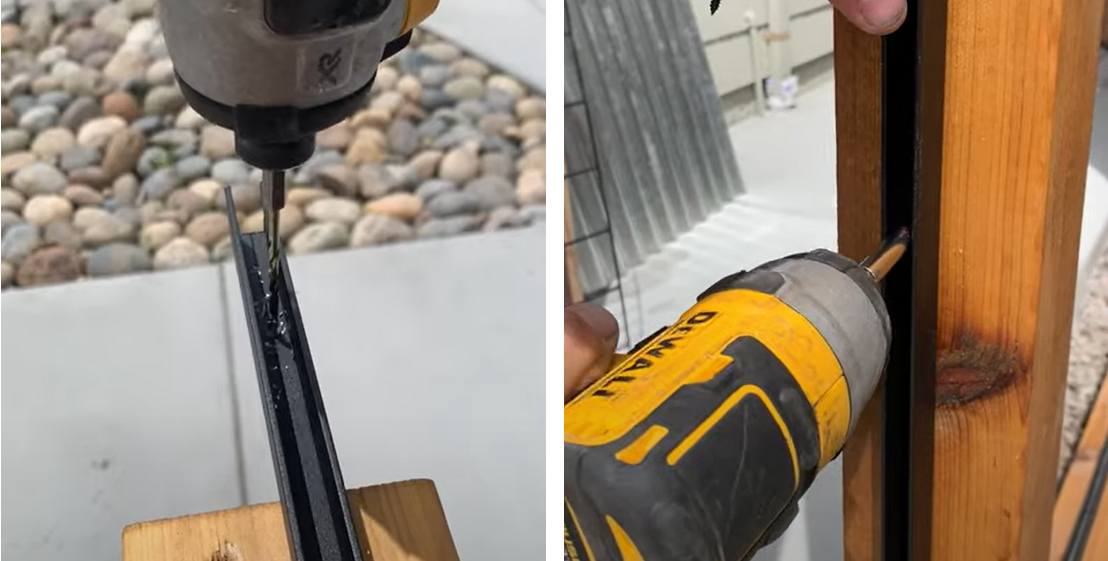
But, if your area is prone to major downpours or frequent rain, or you just want to be cautious, you might choose to drill small weep holes down through your mounted Hog Track and the bottom rail at the middle and ends to create additional paths for moisture to escape.
Fastening
With your Hog Tracks primed for action, it's time to install them. You'll want a fastener every 12 inches, so predrill your track channel accordingly. Then, grab some self-tapping stainless steel screws to secure the tracks to your rails and posts (If you opted for the convenience of the Hog Tracks Kit, you'll already have those fasteners on hand.)
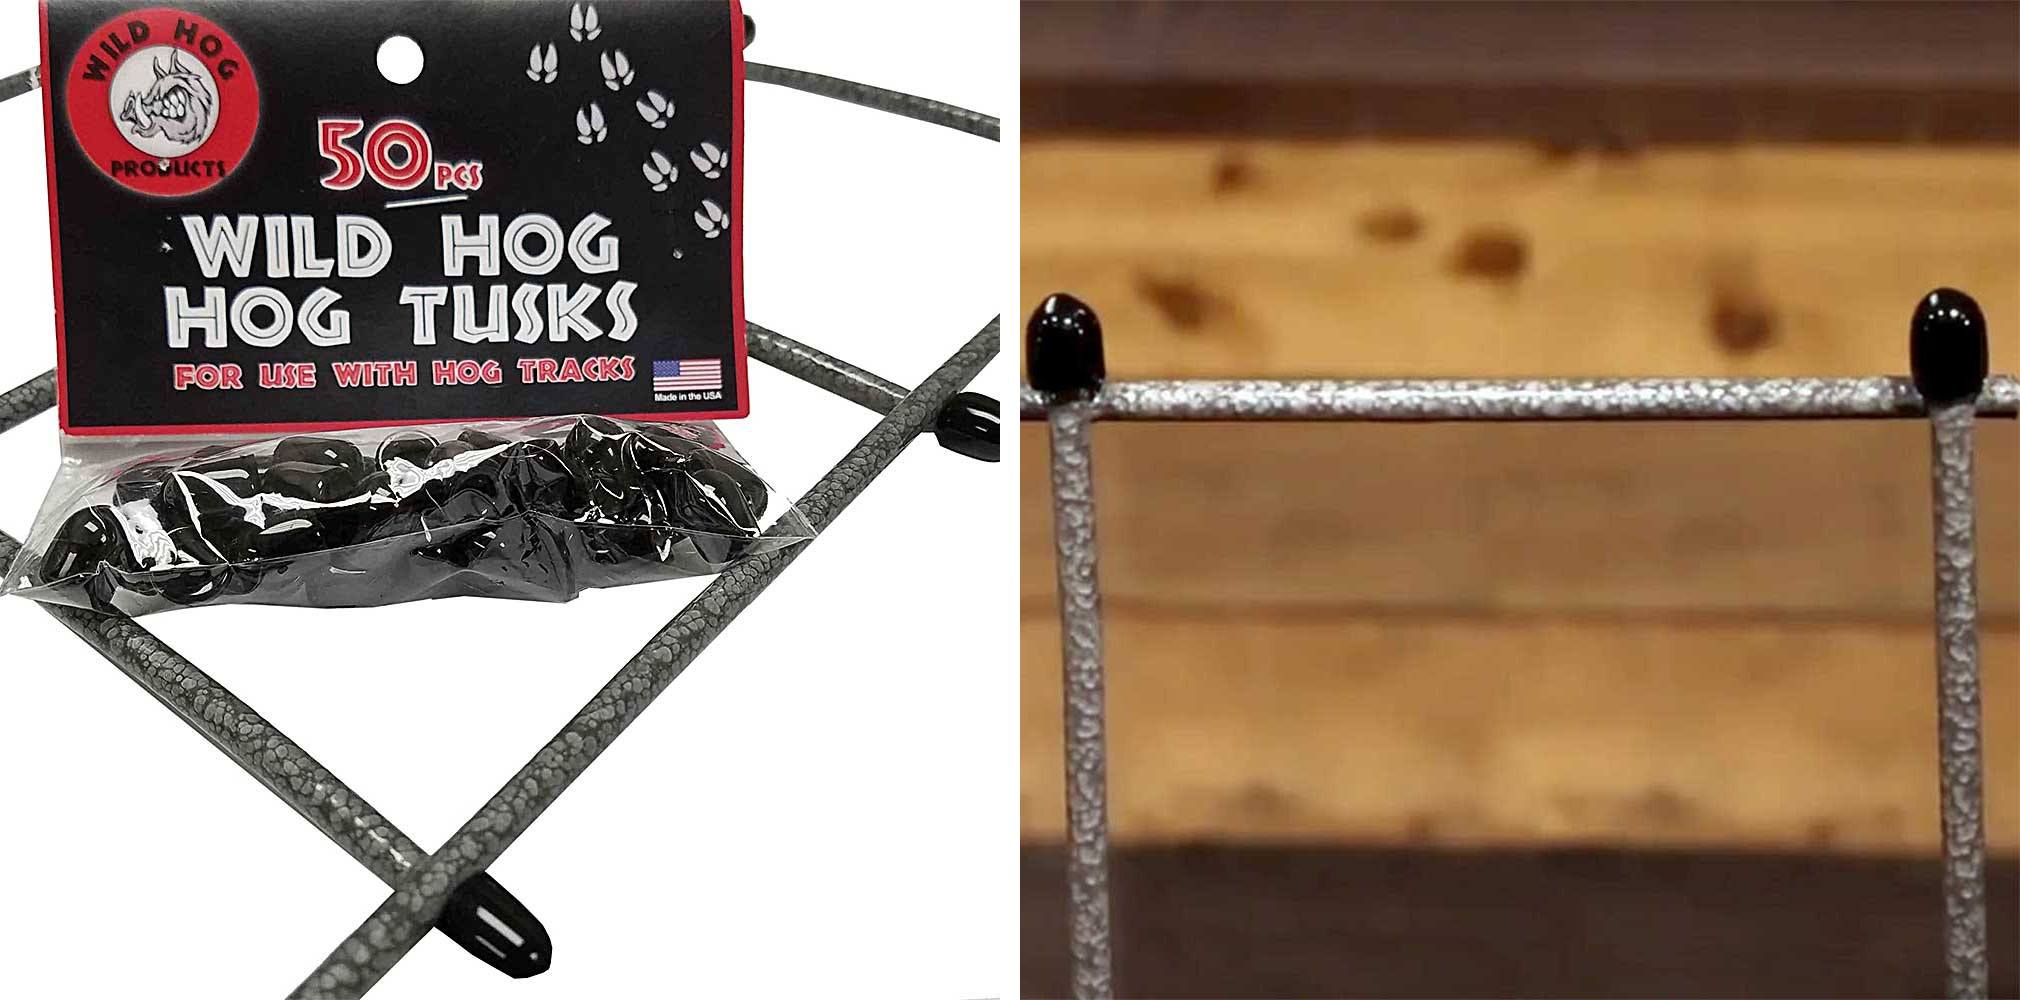
Rattle Remedies
No one likes a noisy railing. So, while these final nuggets of wisdom might not be direct Hog Track tips, they will help your Wild Hog panels fit even more snugly to reduce any play in the Hog Track channels that could cause a rattle:
- Use Hog Tusks. These nifty plastic caps cover the exposed steel ends of your Wild Hog panels to provide protection against rust and corrosion while also reducing rattle.
- For an extra level of anti-rattle protection, you can additionally apply clear caulking or silicone inside the Hog Track.

Tracked!
And that's it! Now you're armed with the Hog Tracks tips to tame your next Wild Hog project and make installation a snap.
If you have any questions about Hog Tracks or the Wild Hog Railing System, pop it into the comments below or contact our helpful DIY Home Center team for answers. And if you're ready to get your project rolling—or just want to scope out the possibilities—request your free Wild Hog Railing quote today.