

A quiet place to escape the hot sun and relax in the cool shade. A special retreat where you can unwind and enjoy your backyard. Maybe even drift away in a nice hammock to the sound of the breeze and the birds…
Sound good? Sounds like you need a pergola.
And this is going to sound even better: You can build a free-standing DIY pergola in no time, even if you don’t consider yourself particularly handy. If you can slide posts into brackets and anchors and use a hand drill, you can do this!
Choose a Pergola Kit
The key to an easy pergola is a free-standing pergola kit that includes all the various components you need for a successful project. This removes the guesswork while saving you the hassle, allowing you to start building right away rather than spending your time scouting for parts and selecting lumber, not to mention hauling those heavy beasts home.
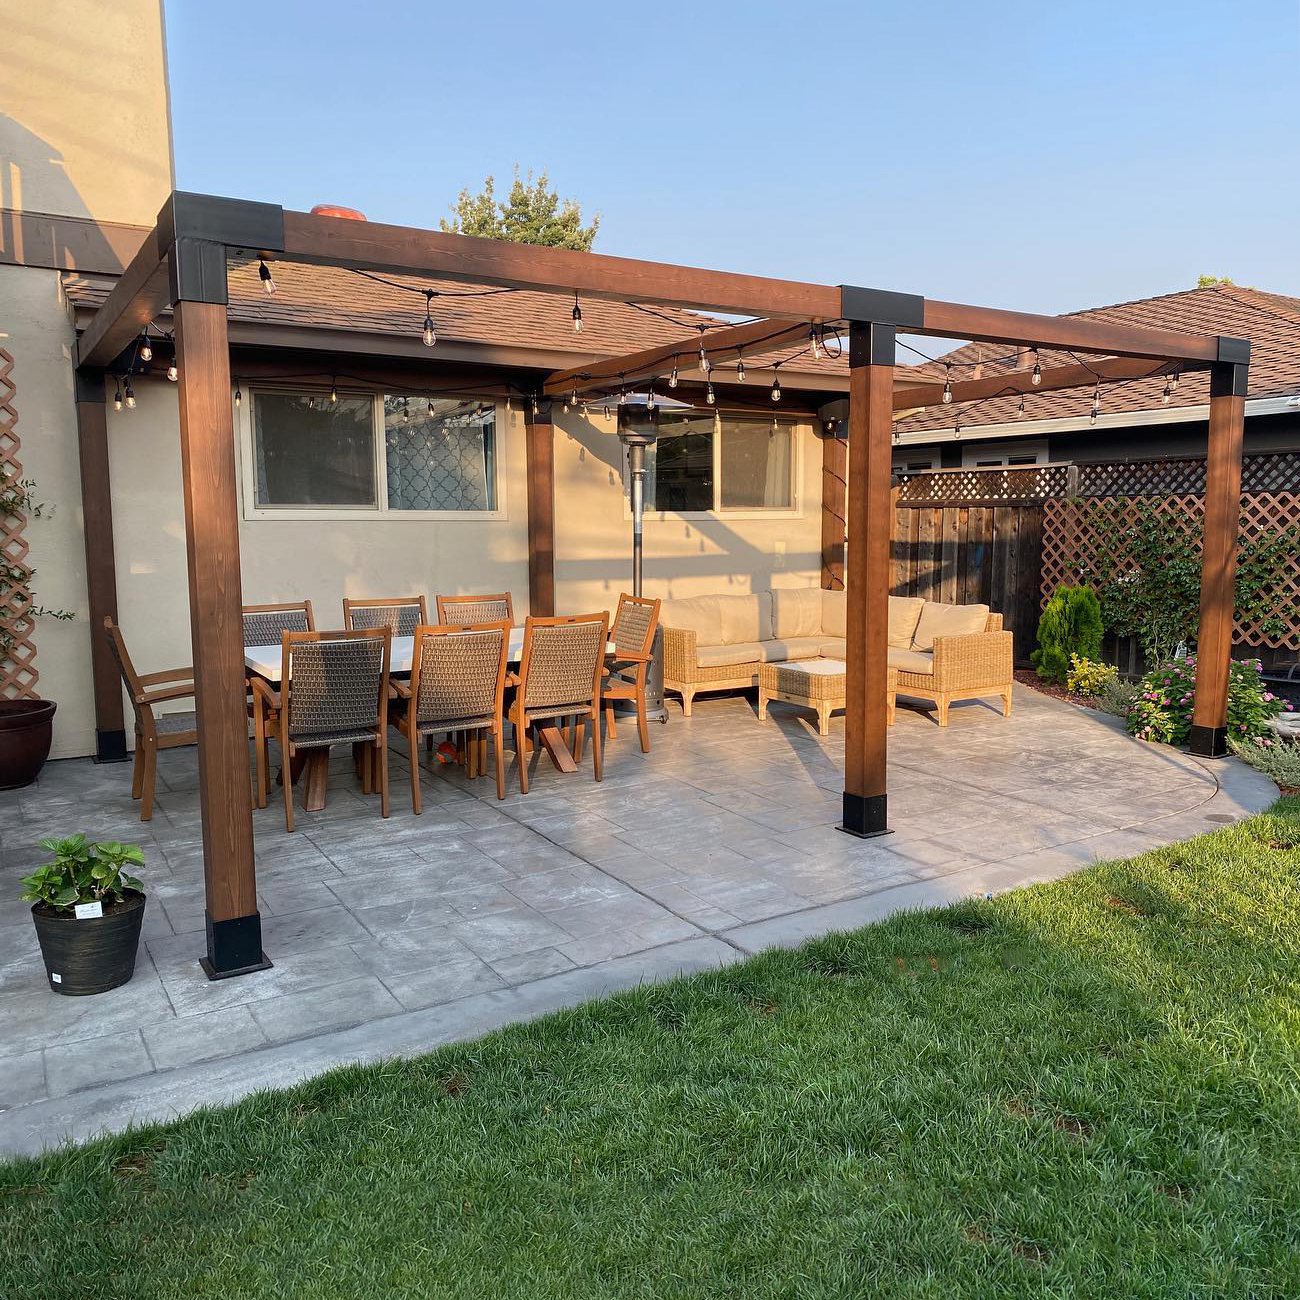
Start by choosing a kit like the Wild Hog LINX Pergola Kit which comes in single-bay (8’ x 8’) or double-bay (8’ x 16’) size with either 4”x4” or 6”x6” posts, or design your own using our LINX Pergola Planner. To learn about our handy planner, check out Your Perfect Pergola Plan in Under a Minute.
Your LINX Pergola Kit comes with everything you need to assemble your DIY pergola in as little as an hour, and certainly within an afternoon. Just think: If you start after lunch, you could be sipping a cool drink in the shade of your pergola before five o’clock!
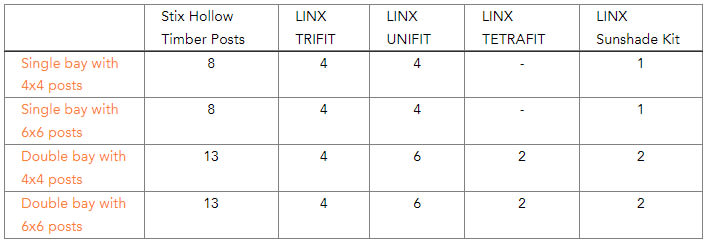
LINX Pergola Kits contain all the components you need, from the timber posts to the hardware, as well as the screws and a drill bit to attach it all. Double bay kits have additional posts, hardware, and a second sunshade.
Now that you know what’s in each kit, let’s take a quick look at each component. You’ll feel even more confident in your pergola-building abilities once you see how easily these pieces fit together.
STIX Hollow Timber Posts
Forget about searching the lumberyard for the straightest wood beams, figuring out how to transport them safely, and struggling to move them at every step of the building process.
The STIX Hollow Timber Posts in your LINX Pergola Kit are engineered, structural timber made from kiln-dried wood that offers limited twisting, warping, and splitting. And they’re two-thirds lighter than standard green lumber, so your back will thank you! Take a closer look at these superior posts with Straight as an Arrow: STIX Engineered Timbers.
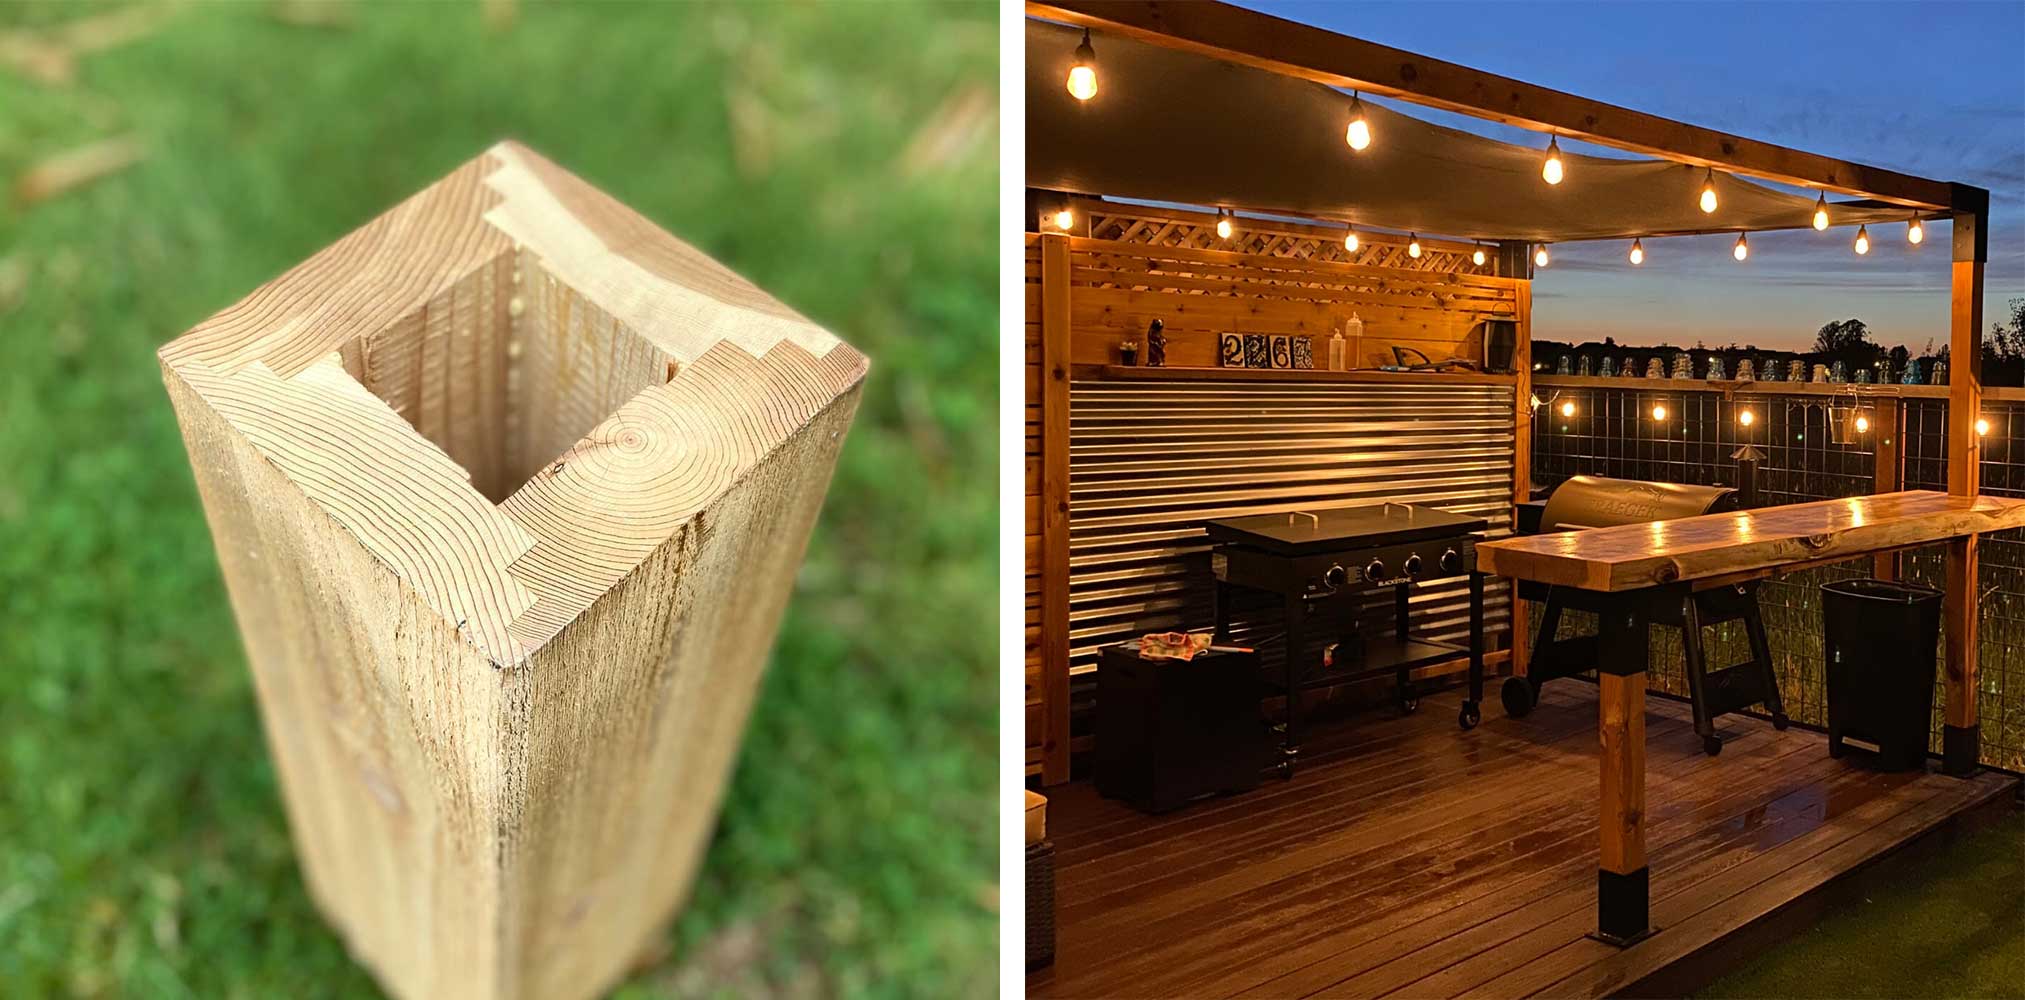
TIP: The STIX hollow core is ideal for concealing electrical wire or cords. Upgrade your pergola by running electricity for lights so you can light up the night! Whether you’re a fan of the retro Edison bulb, modern LED with color-changing options, or strings of festive lanterns, STIX let you run electricity to power the glow and ambiance you want—without any dangling cords.
LINX Hardware
Now, let’s take a look at the hardware components and you’ll quickly see just how simple the construction is: Your STIX posts slide right into the LINX hardware, and because the STIX posts are hollow, they’re easy to maneuver as you assemble your pergola.
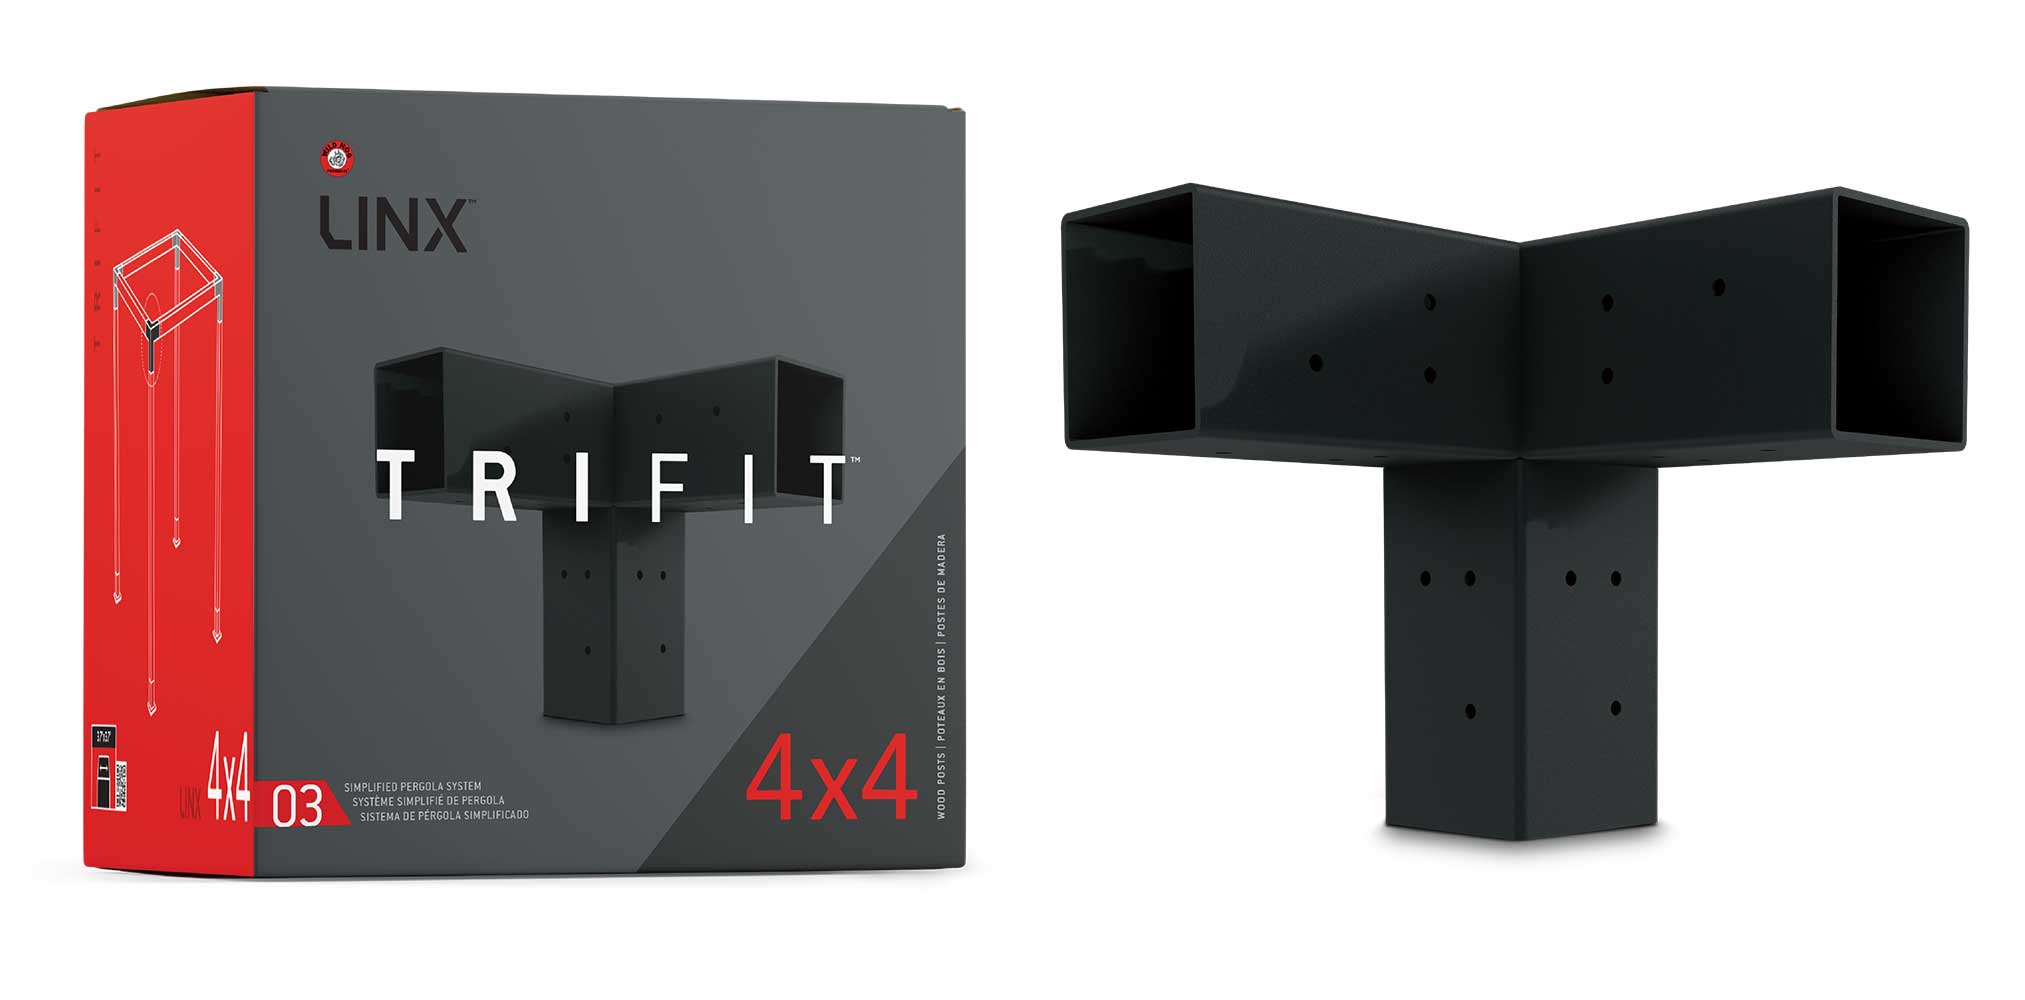 LINX TRIFIT to form corners
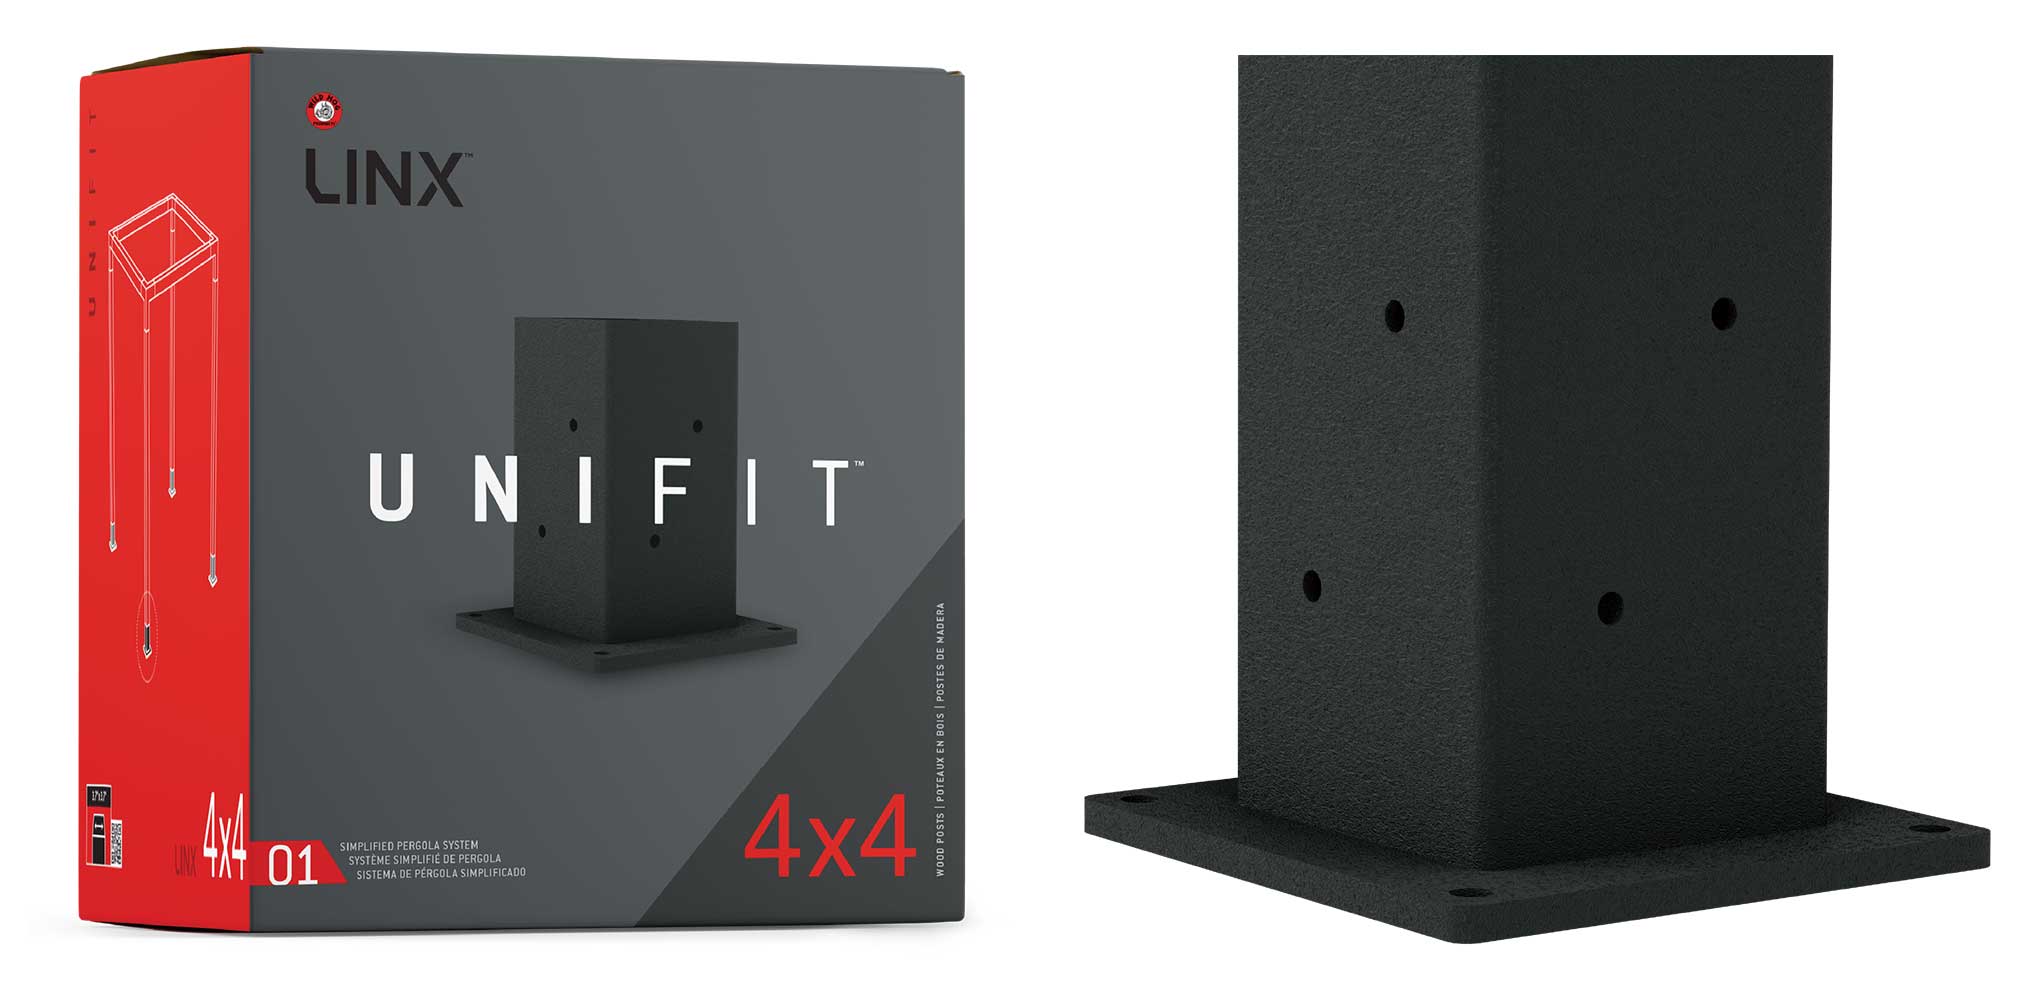 LINX UNIFIT to anchor post bases
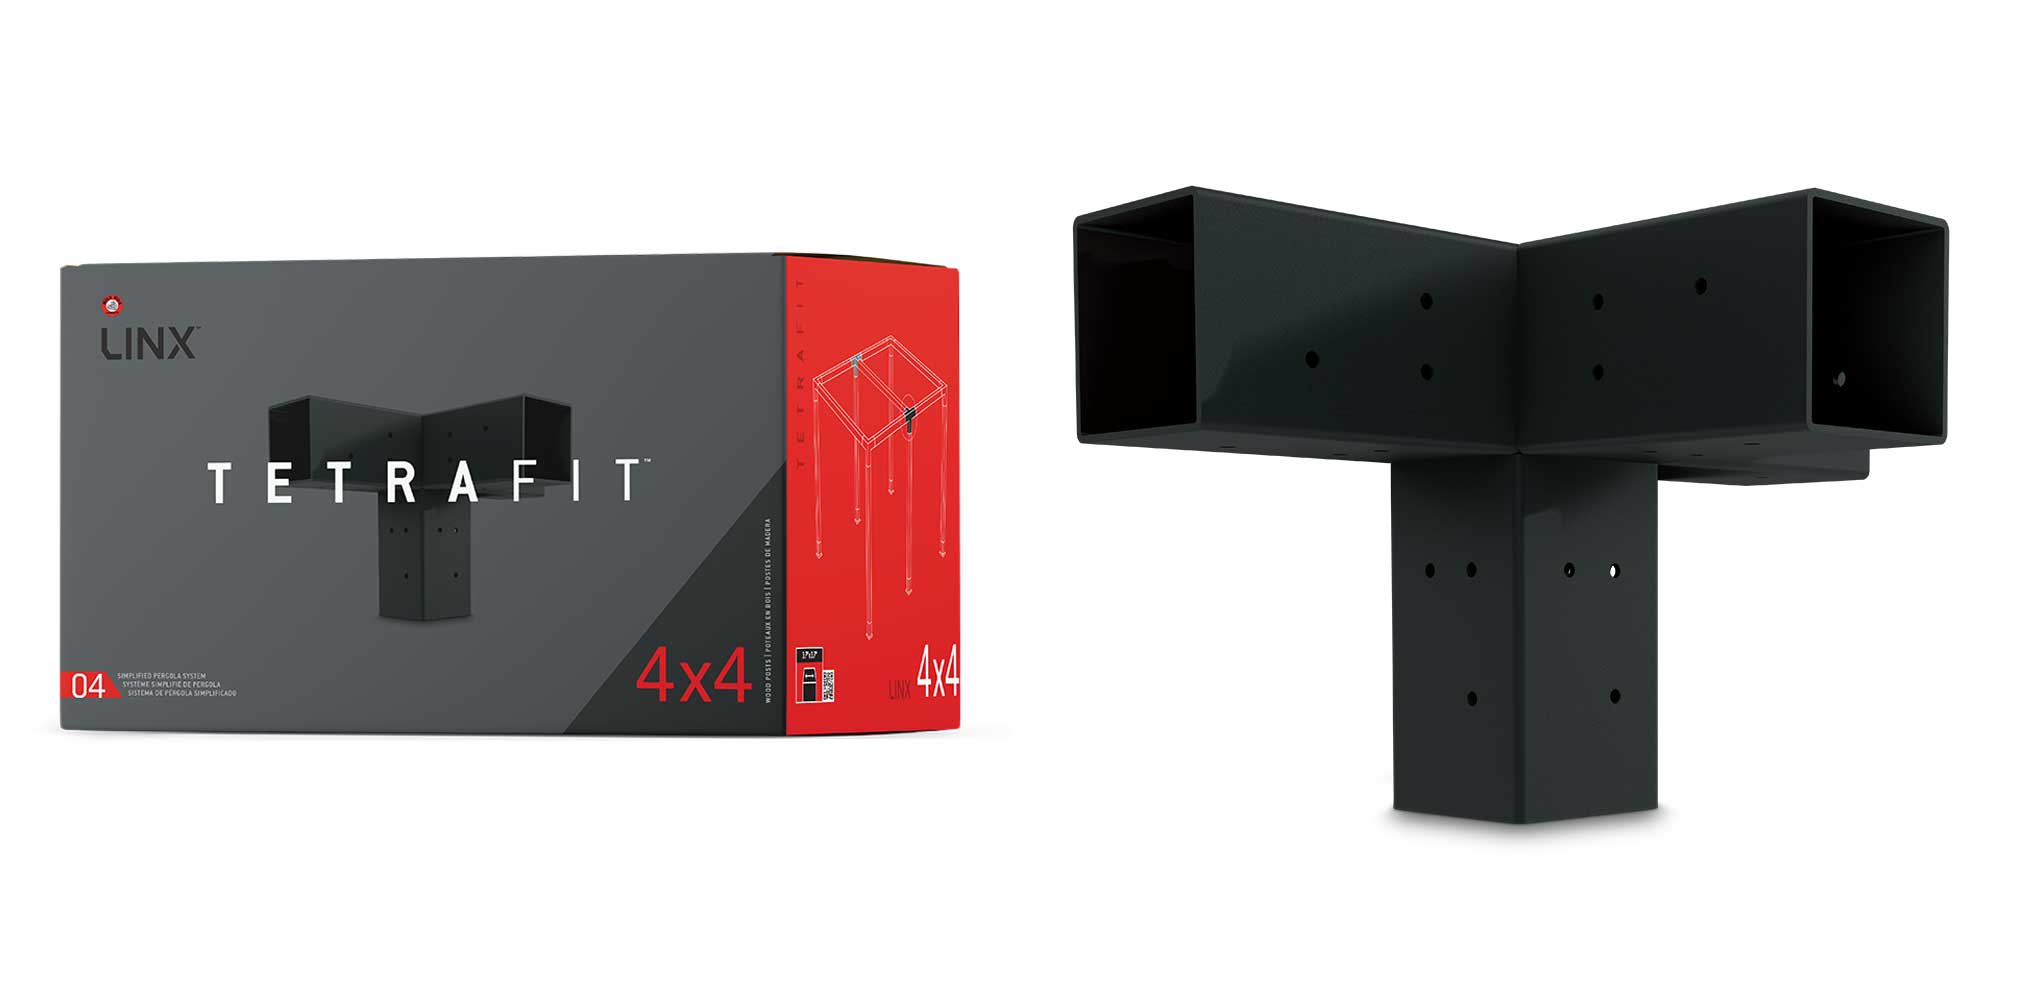 LINX TETRAFIT to connect multiple sections (double bay kits)
All the precision-welded LINX hardware is made of high-grade steel tube that’s more than 50% thicker than standard products, plus it’s galvanized, primed and powder coated for lasting beauty and durability. So, you know your pergola is going to last and look great for years to come!
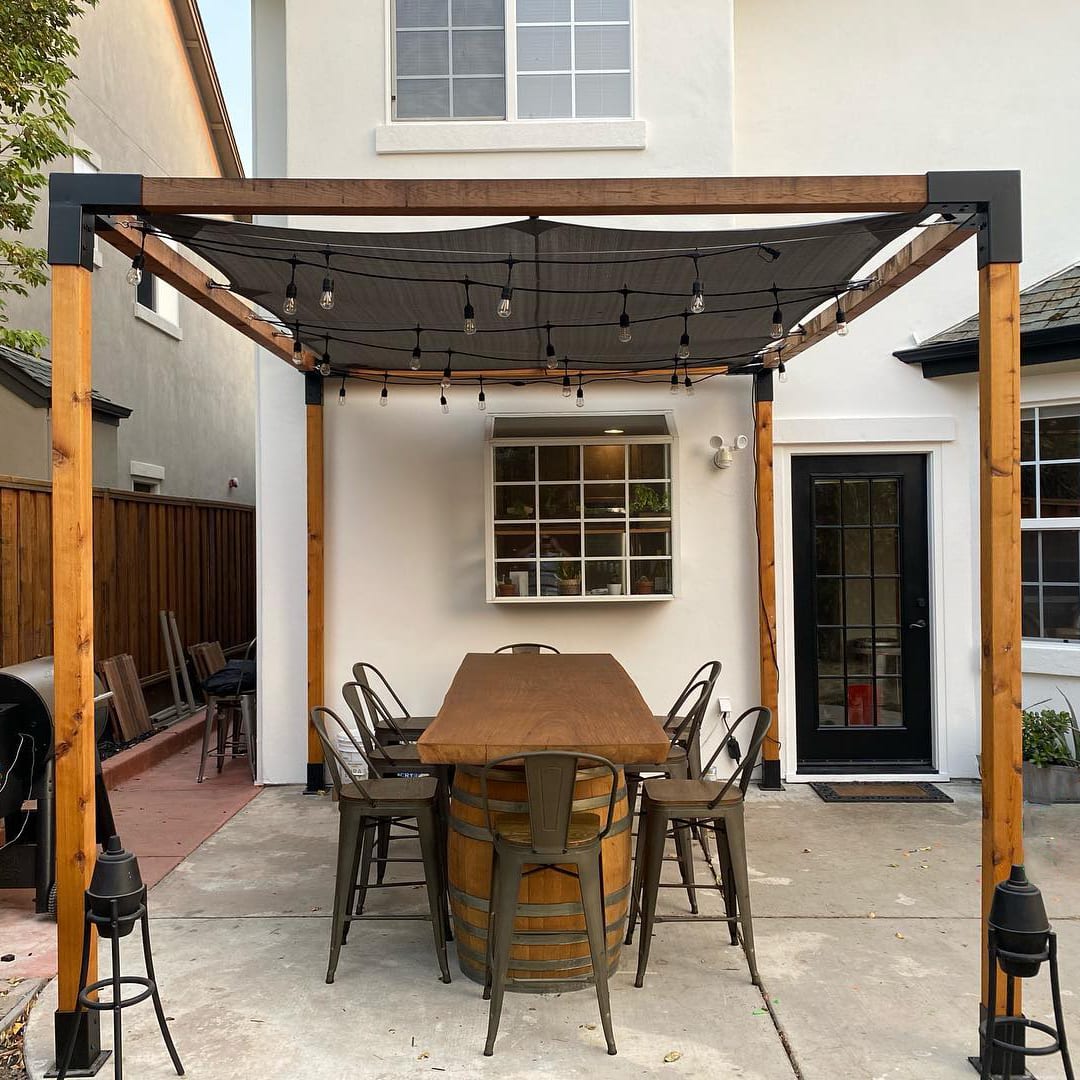
LINX Sunshade Kit
Finally, you’ll receive one or two LINX Sunshade Kits, depending on your pergola kit size, that you can add to the top (or side) of your structure for sun protection.
The extra-thick, heavy-duty cloth is breathable, letting cool breezes pass through while 95% of harmful UV rays are blocked. It also allows water to drain, preventing pooling.
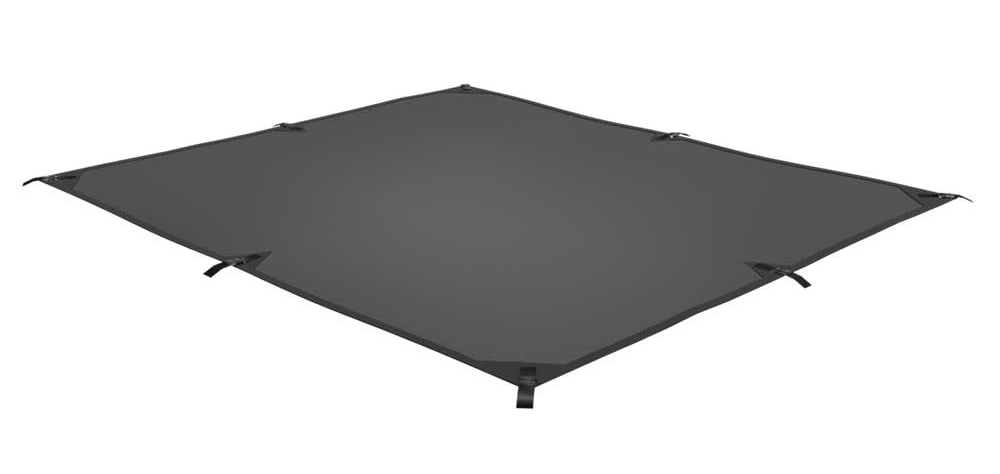
The straps can be cinched down by hand to remove sagging and the shade itself can be removed in minutes in case of extreme weather or for winter storage.
As you can see, you’ll have everything you need to start building as soon as you open your pergola kit, so grab your tools and get ready to jump right in and make quick progress with your DIY pergola project!
Grab Your Tools
We promised this would be an easy pergola project and this tool list drives that home. It’s short and sweet, and there’s nothing fancy here:
- Drill
- Tape measure
- Level
- Ladder
You’ll also want to find a couple of friends available to lend a hand—or four—during assembly to make short work of this project. Promise them drinks in the shade of your brand-new pergola when you’re done and we’re sure they can be persuaded!
Build Your DIY Pergola
Here we’ll give you the high-level steps to assemble your new pergola so you can get a feel for the (minimal) effort and time involved.
These steps are for the single bay (8’ x 8’) LINX Pergola Kit. For double bay pergolas, the steps are nearly the same, but you’ll use two TETRAFIT connectors between the two 8’ x 8’ pergola sections to join them into a single 8’ x 16’ structure.
Here’s what you need to do:
- Assemble the top by forming a square using four STIX posts and four TRIFITS to join the corners.
- Attach two outer screws in each corner with your electric drill and the bit provided.
- Install the sunshade by attaching the four corner brackets, looping the shade strap through each bracket, and snapping the buckle together. Cinch tight and attach side brackets and straps.
- Insert the upright posts.
- Attach all top screws on all four posts.
- Put UNIFIT on each post bottom and attach screws.
- Square and level the base.
- Attach UNIFIT post bases to the ground.
Affix bases per local building codes. Anchoring fasteners are not included.
Sounds easy, doesn’t it? It really is! That’s why a Wild Hog LINX Pergola Kit is the best choice for a smooth, simple pergola installation with no hassles and no surprises.
The steps above are just an overview, but they do hit on all the tasks needed to build your pergola from your LINX kit. Watch the LINX Pergola installation video below to see how it all comes together.
For complete installation instructions, check out the Wild Hog LINX Pergola Install Guide. There you’ll find helpful illustrations, additional details, and important cautions for a speedy and successful pergola assembly.
Enjoy Your New Pergola
Now that you’ve built your DIY pergola, it’s time to enjoy it! So, pull up a lounger, put your feet up, and relax in your new shaded oasis—and don’t forget the drinks for yourself and those helpful friends of yours.
Take time to bask in the satisfaction of a DIY project well done: You’ve earned it!

LINX Pergola with Hammock
Perfect Your Pergola
As you admire your handiwork, consider elements that will make your new pergola a true sanctuary, like lighting, mesh panels for climbing plants, patio furniture, and a fire pit. And if you want to create the perfect spot for napping, be sure to check out the LINX Hammock Kit.
TIP: The modular LINX Pergola System that makes their kits so easy to assemble also makes building a customized oasis a snap! Get started with our easy-to-use LINX Pergola Planner or request a free LINX Pergola quote from DIY Home Center.
If you have any questions about the LINX Pergola Kits or LINX Pergola System, check out our frequently asked questions or contact us— we’re always happy to help. Cheers to kicking back in the shade of your pergola!
Be sure to check your local building codes before starting your pergola project and follow all rules, regulations, and requirements.


